OpenCode
Installation, Provider Setup and Free Model Configuration
OpenCode is an open-source AI coding agent for the terminal. It can help you inspect code, generate files, refactor projects, explain errors, and work interactively inside your development folder.
This guide shows how to install OpenCode inside a local Node-based virtual environment and how to configure the OpenCode Zen provider with a free model.
1. What is OpenCode?
OpenCode is a terminal-based AI coding assistant. It works inside your project directory and can help with tasks such as:
- generating code
- explaining files
- debugging errors
- refactoring existing source code
- creating project structures
- writing documentation
- working with Git repositories
- running commands with approval
- using different AI providers and models
The important idea is simple:
You start OpenCode inside your project folder, connect it to an AI model provider, and then work with it like an interactive coding agent.
2. Why use a local Node environment?
OpenCode is installed via Node/npm. You can install it globally on your whole system, but I prefer using a local Node environment for development tools.
Advantages:
- no pollution of the global system Node installation
- easier cleanup
- project-specific tool versions
- better reproducibility
- safer experiments with beta or fast-moving tools
There are different ways to install Node, depending on your preferences and on your operating system:
- install binary
- install via Node Version Manager nvm
- install via Brew (Mac OS)
In this guide, the local installation folder is represented as:
<VENV-FOLDER>
Example:
~/tmp/opencode
Inside that folder, Node is installed into:
<VENV-FOLDER>/.venv/node/bin/node
and OpenCode into:
<VENV-FOLDER>/.venv/node/bin/opencode
3. Prerequisites
You need:
- macOS, Linux, or Windows with a terminal
- Node.js/npm available in your local environment
- an OpenCode Zen account
- an OpenCode Zen API key
- basic terminal knowledge
Optional but recommended:
- Git
- a test project folder
jqfor inspecting JSON filessqlite3for inspecting OpenCode’s local database- a shell like
zshorbash
On macOS, useful tools can be installed with Homebrew:
❯ brew install jq sqlite
4. Install Node in a local/virtual environment
Choose your own installation method and folder.
For the rest of this article, I use:
<VENV-FOLDER>
as placeholder for your working folder.
Example:
❯ mkdir -p ~/tmp/opencode
❯ cd ~/tmp/opencode
Depending on your setup, your Node binary may be located here:
<VENV-FOLDER>/.venv/node/bin/node
Check it with:
❯ which node
Expected result:
<VENV-FOLDER>/.venv/node/bin/node
Also check the Node and npm versions:
❯ node --version
❯ npm --version
Example output:
v22.x.x
10.x.x
5. Install OpenCode
Install OpenCode globally into your active Node environment:
❯ npm install -g opencode-ai
This installs the opencode command into the active Node binary path.
Check the result:
❯ which opencode
Expected result:
<VENV-FOLDER>/.venv/node/bin/opencode
Also check:
❯ opencode --version
If this command works, OpenCode is installed correctly.
6. Verify the installation
Run:
❯ which node
❯ which npm
❯ which opencode
Example:
❯ which node
<VENV-FOLDER>/.venv/node/bin/node

❯ which opencode
<VENV-FOLDER>/.venv/node/bin/opencode
This means OpenCode is installed inside your local Node environment, not globally in /usr/local/bin or /opt/homebrew/bin.
You can also inspect the package:
❯ npm list -g --depth=0
You should see something like:
❯ opencode-ai
7. Start OpenCode
Go into your project folder:
❯ cd my-project
Then start:
❯ opencode
OpenCode opens an interactive terminal UI.
Important: Start OpenCode from the folder where your project lives. The current directory becomes the working context for the coding agent.
Good:
❯ cd ~/projects/my-laravel-app
❯ opencode
Less useful:
❯ cd ~
❯ opencode
8. Configure OpenCode Zen as Model Provider
OpenCode can use many providers. For beginners, OpenCode Zen is one of the easiest options because the provider and model list are curated for OpenCode.
Preparation
Open the OpenCode Zen page:
https://opencode.ai/zen
Register or sign in.
Then create an API key.
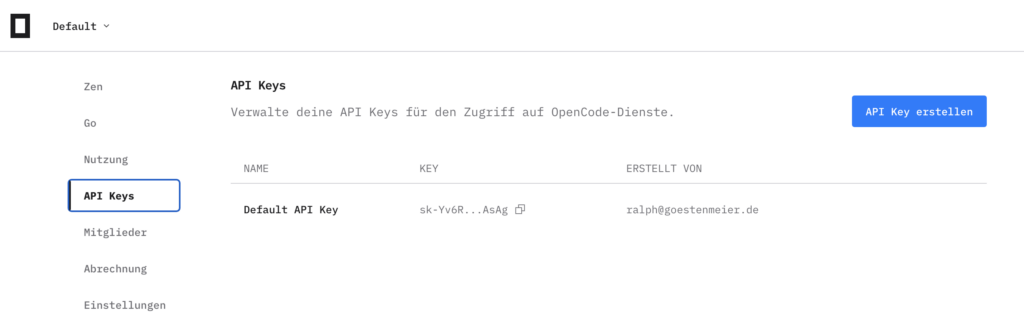
Keep this API key private. It is a credential and should not be committed into Git.
Configure provider in OpenCode
Start OpenCode:
❯ opencode
Inside the OpenCode UI, type:
/connect
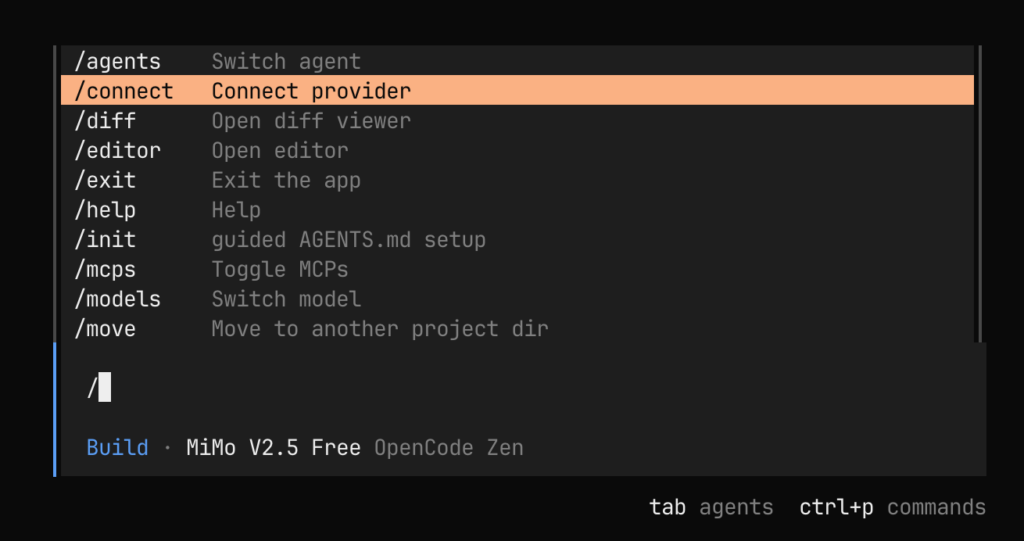
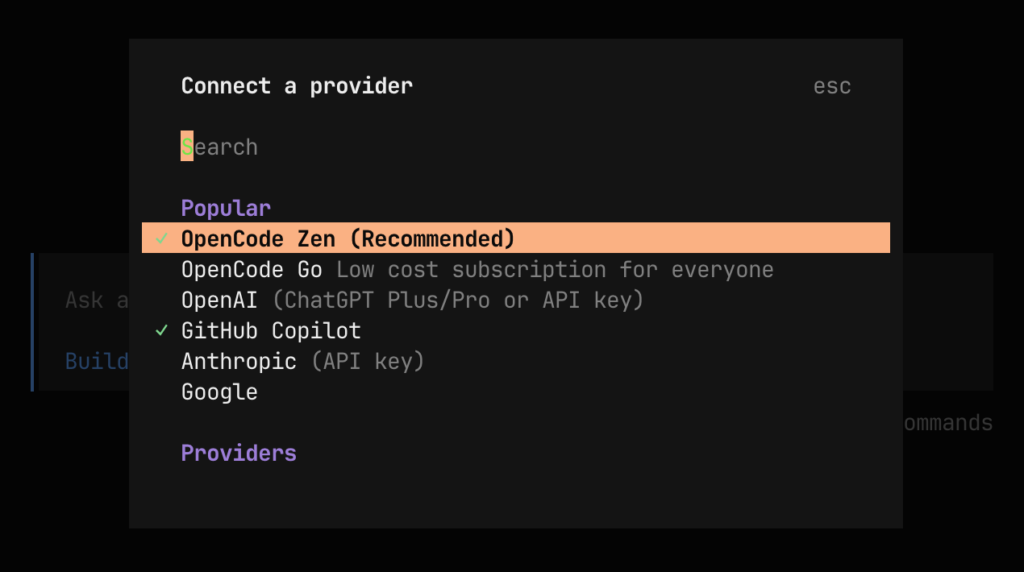
Then select:
OpenCode Zen
Copy your API Key

Paste your API key when asked.
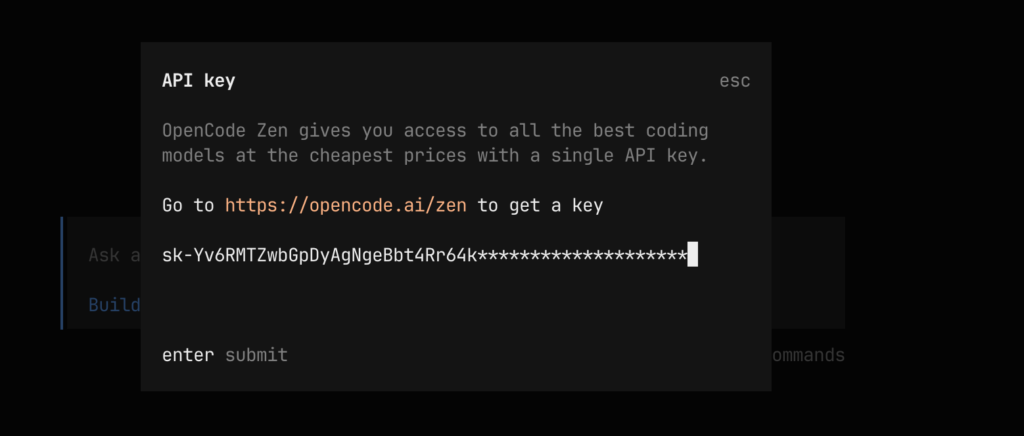
After this step, OpenCode stores your provider credentials locally.
9. Select a free model
After connecting OpenCode Zen, select a model.
Inside OpenCode, open the model selection:
/models
Then search for:
free
Select one of the free model variants.
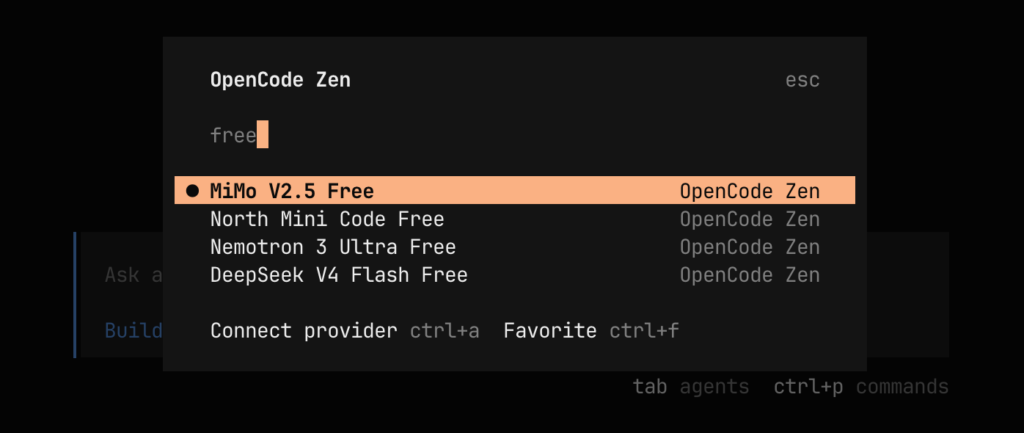
The exact model list can change over time, so do not hardcode the model name unless you want a fixed setup. For experimenting, using the interactive /models command is the easiest approach.
Then select the variant:
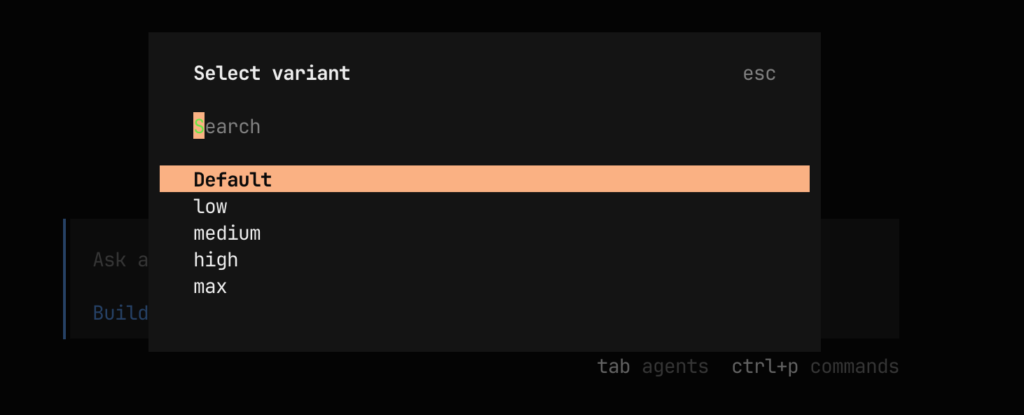
After selecting the model, you can start coding.
Example prompt:
Analyze this project and explain the folder structure.
Another useful prompt:
Create a README.md for this project with installation and development commands.
10. Where OpenCode stores configuration
OpenCode uses several storage locations.
Global configuration
The global config is usually here:
~/.config/opencode/opencode.json
Some installations may also use:
~/.config/opencode/opencode.jsonc
Check it with:
ls -la ~/.config/opencode
Example:
cat ~/.config/opencode/opencode.jsonc
You may see only:
{
  "$schema": "https://opencode.ai/config.json"
}
That means no explicit provider or model is configured in the config file.
This is normal if you configured the provider interactively with /connect.
Credentials
Provider credentials are stored separately from the config file.
Typical location:
~/.local/share/opencode/auth.json
Check whether it exists:
ls -la ~/.local/share/opencode
Inspect only the top-level keys, without printing secrets:
cat ~/.local/share/opencode/auth.json | jq 'keys'
Do not publish this file.
Do not commit it into Git.
Runtime database
OpenCode may also create a local SQLite database:
~/.local/share/opencode/opencode.db
This database can contain local runtime/session information.
Check it with:
❯ file ~/.local/share/opencode/opencode.db
Show tables:
❯ sqlite3 ~/.local/share/opencode/opencode.db ".tables"
Show schema:
❯ sqlite3 ~/.local/share/opencode/opencode.db ".schema"
Project-local configuration
You can also create project-specific configuration:
opencode.json
or:
opencode.jsonc
inside your project root.
Example:
my-project/
├── opencode.json
├── README.md
├── src/
└── package.json
A simple project config could look like this:
{
  "$schema": "https://opencode.ai/config.json",
  "model": "opencode/example-model"
}
Replace the model with the real model ID selected from /models.
The general model ID format is:
provider/model-id
For OpenCode Zen models, the provider prefix is usually:
opencode/
11. Useful OpenCode commands
Inside the OpenCode UI:
/connect
Connect a provider.
/models
Select or inspect available models.
/help
Show available commands.
/init
Initialize useful project context if available.
From the terminal:
❯ opencode
Start OpenCode.
❯ opencode --version
Show installed version.
❯ opencode auth login
Configure provider authentication from the CLI.
Depending on your installed version, available commands may differ. Use:
❯ opencode --help
to inspect the exact CLI options.
12. Tips and Tricks
Tip 1: Start OpenCode in the project folder
OpenCode works best when started from the project root:
❯ cd ~/projects/my-app
❯ opencode
This gives the agent access to the correct files and project structure.
Tip 2: Keep credentials outside Git
Never commit:
~/.local/share/opencode/auth.json
.env
Also check your repository:
❯ git status
and make sure no secret files appear.
Tip 3: Use a project-specific config
For repeatable projects, create:
opencode.json
Example:
{
  "$schema": "https://opencode.ai/config.json",
  "model": "opencode/YOUR-MODEL-ID"
}
This makes the selected model explicit for the project.
Tip 4: Add OpenCode notes to the project README
Add a section like this:
## OpenCode

Start OpenCode from the project root:

```bash
opencode
Provider credentials are configured locally via:
/connect
Do not commit local credentials.
---

## Tip 5: Use clear coding prompts

Bad prompt:

```text
Fix it.
Better prompt:
Analyze the current Django project. Find the reason why the frontend cannot call the API endpoint /api/teachers/. Then propose the smallest code change and explain it before editing files.
Good prompts contain:
- the goal
- the error
- relevant files
- constraints
- expected output
Tip 6: Ask OpenCode to inspect before editing
A good workflow:
First inspect the project structure. Do not modify files yet. Explain what you found.
Then:
Now implement the smallest working change.
This reduces unwanted large edits.
Tip 7: Use Git before larger AI changes
Before asking OpenCode to change many files:
❯ git status
❯ git add .
❯ git commit -m "Before OpenCode changes"
Then you can review changes:
❯ git diff
or revert if needed:
❯ git restore .
Tip 8: Use a clean test project first
Before using OpenCode on important production code, test it in a small demo project:
❯ mkdir opencode-test
❯ cd opencode-test
❯ git init
❯ echo "# OpenCode Test" > README.md
❯ opencode
Try prompts like:
Create a small Python CLI app with tests.
13. Troubleshooting
Problem: opencode command not found
Check your PATH:
❯ echo $PATH
Check where npm installs global packages:
❯ npm root -g
❯ npm bin -g
Check whether OpenCode is installed:
❯ npm list -g --depth=0
If necessary, reinstall:
❯ npm install -g opencode-ai
Problem: wrong Node installation is used
Check:
❯ which node
❯ which npm
❯ which opencode
If node points to the wrong location, activate your local environment again.
Expected:
<VENV-FOLDER>/.venv/node/bin/node
<VENV-FOLDER>/.venv/node/bin/opencode
Problem: provider is missing
Run OpenCode:
❯ opencode
Then use:
/connect
Select the provider again and paste the API key.
Also inspect:
❯ ls -la ~/.local/share/opencode
Credentials should usually be stored in:
~/.local/share/opencode/auth.json
Problem: config file has no provider
This is normal if the provider was configured interactively.
Example config:
{
  "$schema": "https://opencode.ai/config.json"
}
The provider credentials may still exist in:
~/.local/share/opencode/auth.json
The selected model or runtime state may also be represented in OpenCode’s local data directory.
Problem: inspect which files OpenCode accesses
On macOS, you can monitor filesystem access with:
❯ sudo fs_usage -w -f pathname opencode
If OpenCode runs as Node process, also try:
❯ sudo fs_usage -w -f pathname node
Filter for OpenCode files:
❯ sudo fs_usage -w -f pathname node \
  | grep --line-buffered -iE "opencode|auth\.json|opencode\.db|opencode\.json|\.config|\.local"
Problem: inspect the local SQLite database
Check tables:
❯ sqlite3 ~/.local/share/opencode/opencode.db ".tables"
Dump the database:
❯ sqlite3 ~/.local/share/opencode/opencode.db ".dump" > /tmp/opencode.sql
Search for model or provider names:
❯ sqlite3 ~/.local/share/opencode/opencode.db ".dump" \
  | grep -iE "provider|model|opencode|openai|anthropic|google|free"
Be careful: do not publish database dumps without checking for secrets.
14. Recommended project setup
For a clean project, I recommend:
my-project/
├── opencode.json
├── README.md
├── .gitignore
└── src/
Example .gitignore:
.env
.env.*
*.log
.DS_Store
node_modules/
Do not add global OpenCode credential files to your repository.
Optional project-local opencode.json:
{
  "$schema": "https://opencode.ai/config.json",
  "model": "opencode/YOUR-FREE-MODEL-ID"
}
Replace:
YOUR-FREE-MODEL-ID
with the actual model selected via:
/models
Final Workflow Summary
# 1. Create project folder
mkdir -p ~/tmp/opencode
cd ~/tmp/opencode

# 2. Check Node
which node
node --version
npm --version

# 3. Install OpenCode
npm install -g opencode-ai

# 4. Verify installation
which opencode
opencode --version

# 5. Start OpenCode
opencode

# 6. Inside OpenCode
/connect

# 7. Select OpenCode Zen
# 8. Paste API key
# 9. Run /models
# 10. Search for free
# 11. Select a free model
# 12. Start coding
Example first prompt:
Analyze this project and create a short technical overview. Do not change files yet.
Then:
Create a README.md with setup, development, and troubleshooting instructions.